When you begin a new hobby, or are upgrading your supplies and tools like I did in the summer of 2020, take some time to decide your intention for getting more supplies and tools. If you're a new hobbyist, beginner card maker, or casual paper crafter and just came to this post to discover what basic supplies you need to be a card maker, skip on down to the red words and read the supply list. But I'm telling you, you should read the whole thing, because you might need this wisdom some day. 😀
Am I going to make cards and paper crafting projects regularly? How will I use the projects I make?
How old are the products I already have? Will I find that using the old products and tools are more of a hindrance than a help?
Will I have the space to store them properly for care, and for use?
Am I prepared to replace the consumables (Paper, embellishments, glue, ink refills) regularly?
What is my long term goal for accumulating stamp sets, dies, and tools?
Beginning in the spring of 2020 when all of our lives changed - we were staying home more than some of us wanted (Me!) and eventually working on projects we'd put off for that "rainy day" when we might have more time or interest (that meant now!). One of those tasks for me was out a lifetime of craft supplies and organizing my craft room. Now it wasn't just cleaning - you know, like vacuuming the corners and walls, but opening every cupboard door and drawer and box lid. Yikes! You mean I really have had that for ten years and never opened it once?!
I started a "I don't use this" box and another, "I guess I've realized I'm not interested in doing this anymore" box which was really hard. It didn't fill up as quickly as I had hoped. $300 later - the result of selling my useable craft supplies, not only gave me more space, but a new outlook as to what I really wanted to spend my time doing - making cards. Also 2020 had opened up my mind (and probably yours, too) to the necessity of sending cards to so many people in need, as I say, to "cheer up the world, one card at a time."
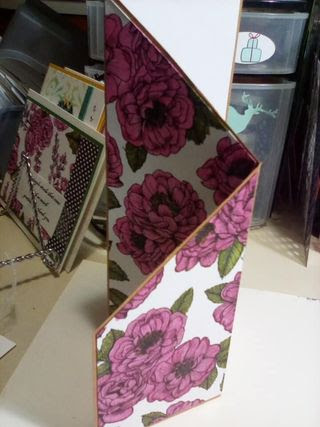
I began to watch Stampin' Up Demonstrators and others of every paper crafting product and company teaching how to make the most amazingly beautiful cards. I was still under the belief that YouTube was for wacky things and old, old television shows. Boy! was I wrong! There's probably still wacky things and old television shows, but now I was learning the latest card making techniques, and the tools and products needed to do them. I was hooked on the fun folds. Here's some samples of ones I've made:

Cube Card
and the Z folds and the pocket cards, and ......and......good thing I had already asked myself the questions, so I'd know what direction I needed to go.
If you are at the point where you should clean out your supplies - just get started with the questions because the boxes will come next and you'll be able to fill them up. It really is freeing - yes, you can do it - tell yourself that someone else will be delighted to get a box of products for their new hobby. Why do all that, soul searching questions and boxes, you say? so I wouldn't end up with every paper crafting product from every company under the sun and in 10 years have to go through this mess again!
Even if you've never been a craft collector like me, and are just getting started, this post is for you too! Here's the list of what I would recommend for a beginner card maker (or what basic supplies to keep from your lifelong list of craft collectibles). Click on each link to see the product and read the description below it.
Basic White Cardstock $9.75/40 (U.S. prices) (you can get 80 cards out of 1 pkg)
Basic Stamp Set Or a stamp set that will give a variety of uses and icons $5.50 - 23.00
Black Ink pad $6.00
Ink Spots and Ink Refills $9.00/5 of the mini "spot" pads for you to add your choice of color; $3.75 for the refills and two or more colors
Of course you would need envelopes for the A2 (5 1/2 x 4 1/4 inch) card. Or make the mini slimline that uses a regular letter envelope or the slimline that uses a No. 10 business envelope. You can make your own envelopes out of a variety of paper as long as its not too thin. I often use old calendar pages, but make sure to use a white label so the postman can read the address clearly. You'll find envelopes here. $7.50/40
You will need a good pair of scissors, a cutter with measurements and adhesive and glue. This glue gives you a few seconds to reposition your item before it adheres completely. It is very strong and also recommended for its fine tip on one end and wide tip on the other.
If you didn't want to invest in the ink colors, or a detailed stamp set in the beginning, you could start with the black ink pad for a sentiment, and DSP - designer series paper which is double sided, and could yield as many as 72 cards out of one 12x12 pkg. ($11.50 - $15.00)
There are two other ways to make cards without investing in too much in the beginning: kits. The kits come with precut designs that are double sided, and of course, coordinating colors; pre-printed sentiments and tags, envelopes and all the pieces you need to make cards and for a reasonable price.
$10/50 cards
You might also like the monthly subscription kit,
Paper Pumpkin,

This kit includes everything needed to make 6-8 themed cards. This is also a fun activity for kids. Get one month. Two months, six or more. Save money the more months you subscribe to. This is also a good way to increase your variety of inks, and stamps which are not included in any other catalog.
There's alot to think about here, but I can assure you, after making cards for 30+ years, that there is great enjoyment in making cards to include in a gift, to give to a friend, and to have on hand for the many events that surprise us which we need a card for.
Card making - a little at a time - is how this can be done. Some crafters fall in love and want it all, all at once. Some crafters enter the hobbyist stage acquiring a few supplies and intend to add to their collection.
Whatever your interests or goals, I hope you find this helpful. Come and join the community of card making. Watch videos, look at scads of designs and ideas from card makers around the world, then use your imagination to create a cheerful greeting; and help to "cheer up the world - one card at a time" as I say.
I hope you find these suggestions helpful. (thanks for reading to the end!😮) I'd love to know if you are a card maker. Will you share your project below? Thanks for stopping by! Be Blessed! sb