Saturday, October 16, 2021

Basic Cards with Stampin' Up

 Sometimes starting a new hobby seems daunting when you look at how others thrive at it.  But don't let that stop you from being part of the community of card makers!  Making a card is a past time, a hobby that is enjoyable.  Whether you are a master artist or a lover of color or simple art, cardmaking is for you.

Here are three cards that demonstrate how simple yet beautiful a card is.  

The first card (top left) has a tag with background stamp, sentiment and twine.  The texture of the basic white cardstock sold by Stampin' Up is quite smooth.  You could assemble this card in a short time, have several on hand, and be prepared to send a note of encouragement or a "hello" at any time.


The second card (top right) has a colored base card, and texture is added by the use of an embossing folder. The same tag is used with the same sentiment, though a piece of ribbon replaces the twine.  

The third card's design includes more components: a stamped image in coordinating colors, two colors of twine resulting in more texture. The tag is punched with a tag punch and popped up with dimensionals.

Here's the link to my online store where you'll see these products and more ideas, check out the calendar for events and be inspired.

 Www.susanboback.stampinup.net


Thanks for stopping by!  Be blessed!  sb


Thursday, October 14, 2021

MYSTERY & The MASK Card Class

You probably didn't realize you had the ability to solve a mystery!

MYSTERY & THE MASK - Card Class

MYSTERY CARDS Inspired by Karen Titus, Ind. Stampin' Up! Demonstrator and my Team Leader.

But first to encourage conversation and community, we'll have some fun with a Seek & Find puzzle I created. You can design your own at www.education.com.


Here are the clues: (I'm CASE-ing from Karen Titus.  CASE is Copy And Share Everything, very much encouraged in the card making community)

1 – A2 CARD BASE IN A COLOR (one piece of 81/2” x 11”, folded in half, it measures 5 ½ x 4 ¼ “)

1 – WHITE LAYER (4 x 5 ¼”) Note that the layers are 1/4 “ smaller on both sides.

1 – Coordinating piece to the card base DSP (Designer Series Paper) 1 x 4”

1 – Coordinating piece of DSP 1 ½ x 4”

A Punched out, Die Cut or Fussy Cut (hand cut) image as an accent

Instructions:

       Attach the DSP pieces in your choice of design to the white layer

       Attach the white layer to the base card.

       Add the accent image and sentiment if desired.

You’ve solved Mystery #1


The tulip DSP is perfect for this layout. The blue version is similar.


MYSTERY CARD #2 – taking Card #1 up a notch

1 – A2 COLORED CARD BASE

1 – 2 ½ “X 3 ¾” PIECE OF THE SAME COLORED CARD BASE OR COORDINATING COLOR

1 – BASIC WHITE LAYER, 4 X 5 ¼ INCHES. NOTE THAT IT IS ¼ “SMALLER ON BOTH SIDES

1 – 2 ¼ X 1 ¾ INCH WHITE LAYER PIECE (NOTE THAT THIS PIECE IS ¼” SMALLER THAN THE COLOR PIECE)

A Punched out, Die Cut or Fussy Cut (by hand) image as an accent.

2 – DSP 3 ¾ X 1 ¾ “AND 1 – 3 ¾ X 1”

Instructions:
1.   Attach the DSP PIECES (3) TO THE BIGGEST BASIC WHITE LAYER IN YOUR CHOICE OF DESIGN.

       2. Layer the image (PUNCHED, DIE CUT OR FUSSY CUT PIECE) on the smaller white layer, then attach the white to the smaller color layer.

33.Attach the smaller layers with image in your choice of design to the card front. 

.       4. Add sentiment if desired.


CONGRATULATIONS! YOU’VE SOLVED MYSTERY 1 & 2!  Make easy cards with these 2 patterns to use up small pieces of DSP, or when an easy, quick card is needed, or when making many cards at a time.


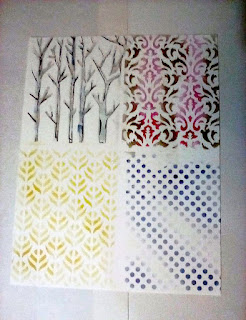
THE MASK in today's "Mystery & the Mask" Class is a stencil. Create backgrounds with color coordinated inks, using the Blending Brushes or sponge daubers.

Build your card front with one of these sample prints. Layer as you did for the Mystery Card. Embellish with a die cut or fussy cut (hand cut) image.


If you aren't fond of white as the back color, with a lighter shade of ink, sponge or use the blending brush, and lightly add the color first over the whole card base, then use a darker shade with the stencil, making sure to add more ink to make the pattern of the stencil stand out. (no photos of that technique)


I love crafting with you! Thank you for spending the afternoon with me.

In today's class one lucky crafter will find a coupon on the inside of the "wrap" that is made with fabric-looking DSP on their snack cup.


Thanks for stopping by! Be blessed! sb

Before you dash off, do you realize that you can get $125 worth of products for $99 with free shipping? And then beginning with your first order, a savings of 20%. You can stay a hobbyist and never sell to anyone but yourself; or you can share these amazing products with friends. In addition, you get further discounts, see new products before they are sold, get rewarded for sales, and be part of a creative community. Read how Stampin' Up! has changed my life here on my Stampin' Up! webpage. I'm always available to talk with you. Join my Team - We're the Card Connoisseurs!


Tuesday, October 12, 2021

12 Days of Christmas with Karen Titus

 Check out Karen Titus - 12th day of 12 days of Christmas

New Facebook Page


Card-Connoisseur


You're invited to check out my new Facebook page.