Thursday, July 22, 2021

Christmas in July & Sale A Bration

 Stampin' Up! Mini Catalog goes LIVE August 3, 2021

Here are a few card samples I made from the Whimsy & Wonder, Designer Series Paper - DSP - and Happy Holly-Days Suite, punch and Cling Stamp set and Time worn Type 3D Embossing Folder.

  This card pattern is a Tower Card with the fun new DSP Designer Series Paper Whimsy Wonder.

I CASEd (Copy and share Everything) the idea for this bird card from Jo Blackman, another Stampin' Up! Demonstrator.


 Card base is Evening Evergreen cardstock, A2 size card, 5 1/2 by 4 1/4.


Card base is Garden Green cardstock and punched with Holly-days punch.


Inks used are Old Olive, Real Red, Crumb Cake, Early Espresso rubbed across the embossed image background made by Music, and Time worn Type 3D Embossing Folders.

Clear Embossing powder for the bird then filled in with Stamp in' Write, and Blends markers in Dark Old Olive, Garden Green, Lt. Soft Shade and Lt.  Daffodils Delight. 

Bird is hand cut.

Greens and tans also used for the holly leaves punched out of white.

Mossy Meadow braided trim, stretched apart.

Real Red cardstock

Basic White Cardstock

Real Red and Old Olive ink drop spritzed with water, then flicked with paint brush for speckled background.

Mini Glue Dots were used to attach bird, braid and holly.

Tombo Liquid Glue is the adhesive.


Woodland Texture trees embossing folder is the background here. (Stampin' Up! retired folder)


Learn how you can earn free stamp sets and beautifully coordinated DSP with a $50 order in August and September. Or get a Discount as my new customer.

Visit my webpage to see these products. Contact me about a Beginner Card Making Class.

www.susanboback.stampinup.net

View cards from class on this blog.


Thanks for stopping by. Let's cheer up the world, one card at a time! Be blessed! sb

Friday, July 9, 2021

Card kits for Susie

 Susie is my niece but we haven't seen each other much in the last 20 years.  She's coming to visit this summer - to Northern Michigan from Arizona via Boston and southern Michigan. So I thought, "why not gift her a card kit complete with the instructions?" Her birthday is in a month anyway.

Susie and I visited for a few hours but that's not enough ever! I decided to post the suggested ideas on this blog so Susie can access them from where ever.   Susie: this is for you!  And, Happy Birthday!

These four cards have simple cut outs.  Keeping it simple is using whatever materials you have to assemble a similar card.  "Let the paper do the work" is our concept - your card does not have to be complicated to be meaningful, beautiful to others.   I tell my class, "You are the artist! Make it how you want it to be!"  


Here is one finished card by just adding a few coordinated pieces. The pieces and ideas for this simple but cheerful card are found below. 

Next these photos are one of the kit cards from the new Stampin' Up! card kits.


The 2 pictures above show the inside space of this unique Post Kit. No stamping is involved.

The front of the card shows the "mail slot" where a pre made note card slips in. The sections are attached with Tear and Tape. 

In addition there is a space inside for a note from the sender. It folds in half and with the use of this envelope, send it on its way. Use a first class stamp. (Remember that any additional padding or increase in thickness beyond 1/4 inch will increase the postage by ounce.)


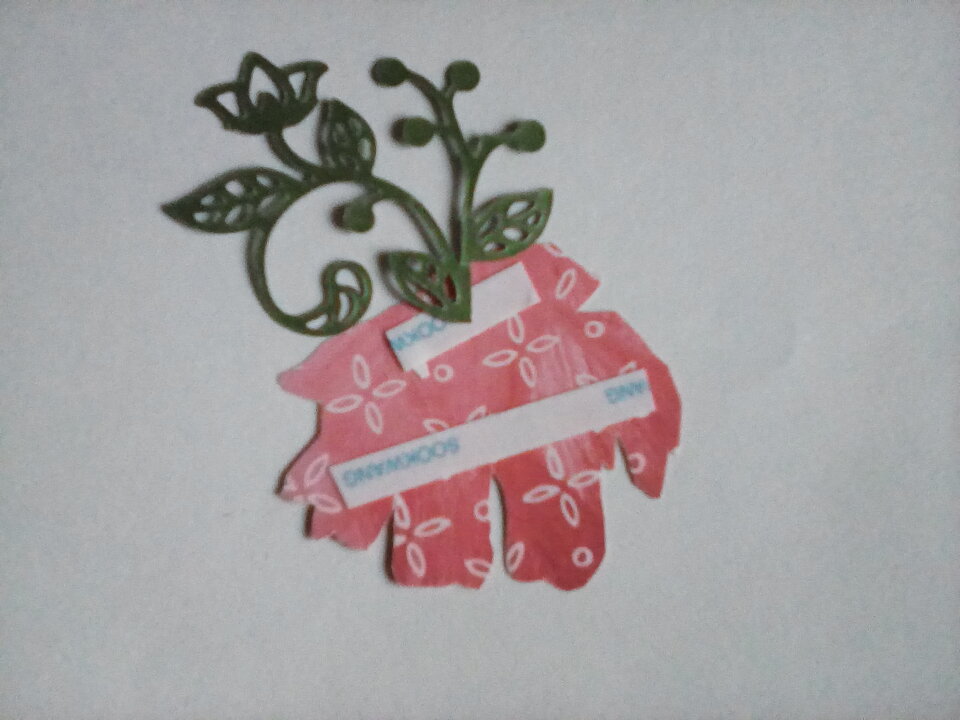
This card is planned with these die cuts with Tear and tape. Peel off the layer as shown on the back of the pink flower. It should be enough to attach each piece securely.
If you're making cards with your own supplies, I recommend using Tombow Mono Liquid Glue. A little goes a long way, such as a dot or squiggle the size of thread.
For example, 75 card fronts and many more cards were assembled with one 25g or .88 oz container. 
The adhesive shown is Tear and Tape.

As shown in the very first photo, this card is from the paper pumpkin kit which is a monthly subscription, no experience or supplies needed.


You're the artist! Use these photos and samples. Design and assemble yours as your creativity inspires you.
What do your cards look likeSusie? Post a picture. I'd love to see yours!


Some of these are from kits. For more information, ideas and products to create your own cards visit My Stampin' Up! Website.

I'm always available for an internet chat where we can make cards with similar kits from me or Stampin' Up!

Leave your message here or contact me through messenger.

Thanks for stopping by. Be blessed. SB